


Introducing Multi-Mesh
Sometimes it may be easier to mesh a body with multiple solid geometries in pieces, and then combine the meshes. RecurDyn V9R3 now supports this functionality, known as “Multi-Mesh.”
The following steps explain how to use Multi-Mesh. Below are links to download sample files to follow along:

STEP 1: Geometry Preparation
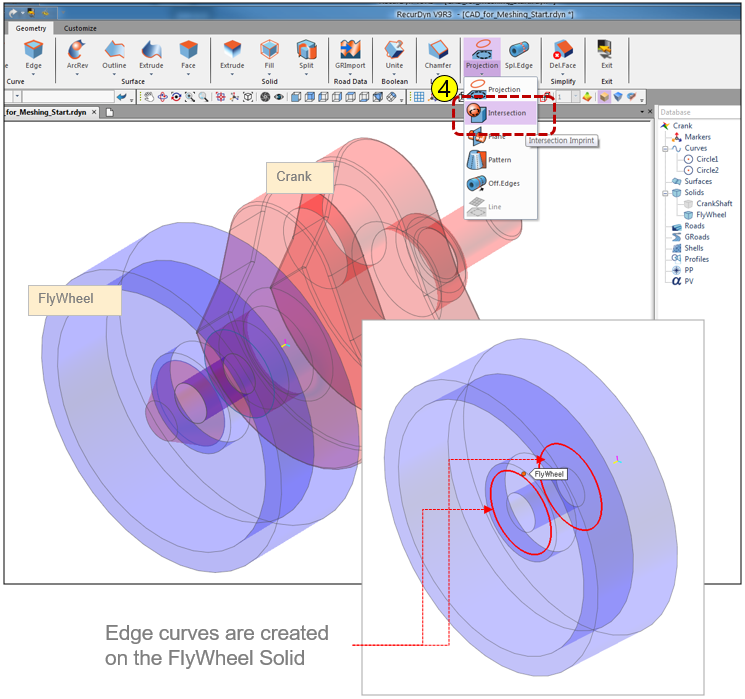
To use Multi-mesh, each pair of geometries in contact must have a coincident curve or line. The procedure below creates a coincident edge curve on each solid body (using the imprinting function).
① Start RecurDyn V9R3.
② Open “01_Multi-Mesh_Start.rdyn”.
③ Change to body edit mode of the body, “Crank”.
④ Click Intersection (Geometry tab, Imprint group, Intersection command).
⑤ Select the FlyWheel solid.
⑥ Select the CrankShaft solid
⑦ Click Exit
STEP 2: Do the 1st Meshing
To use Multi-mesh, each pair of geometries in contact must have a coincident curve or line. The procedure below creates a coincident edge curve on each solid body (using the imprinting function).
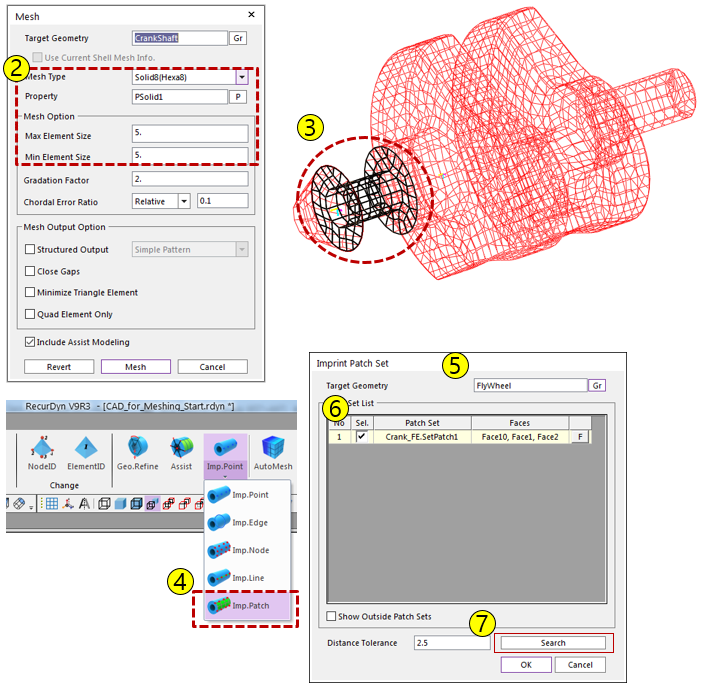
① Enter the Meshing Mode for the Crank body.
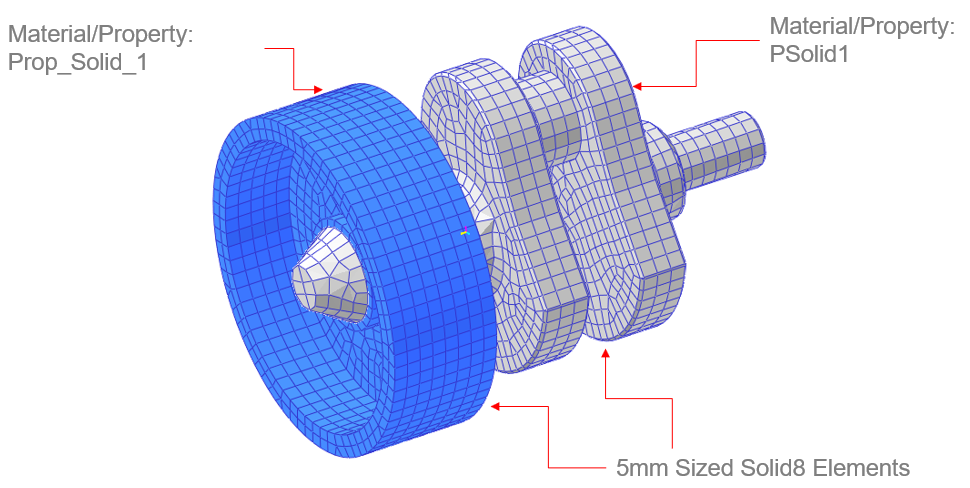
② Mesh the “Crank” with Solid8 elements. (use 5mm for Min/Max Element size.)
③ Create a PatchSet on the Intersected surface.
④ Click the PatchSet Imprint (Mesher tab, Mesher group, Imp.Patch command)
⑤ Select the “FlyWheel” solid
⑥ Select checkbox in the Sel. column in the 1st row (Crank_FE.SetPatch1)
⑦ Click the Search button, then RecurDyn searches the intersected surfaces on FlyWheel automatically (Face10, Face1, Face2).
⑧ Click the OK button.
※ Note: By Using PatchSet Imprint, RecurDyn Mesher tries to imprint the element information on the Solid, ‘FlyWheel’
STEP 3: Do the 2nd Meshing
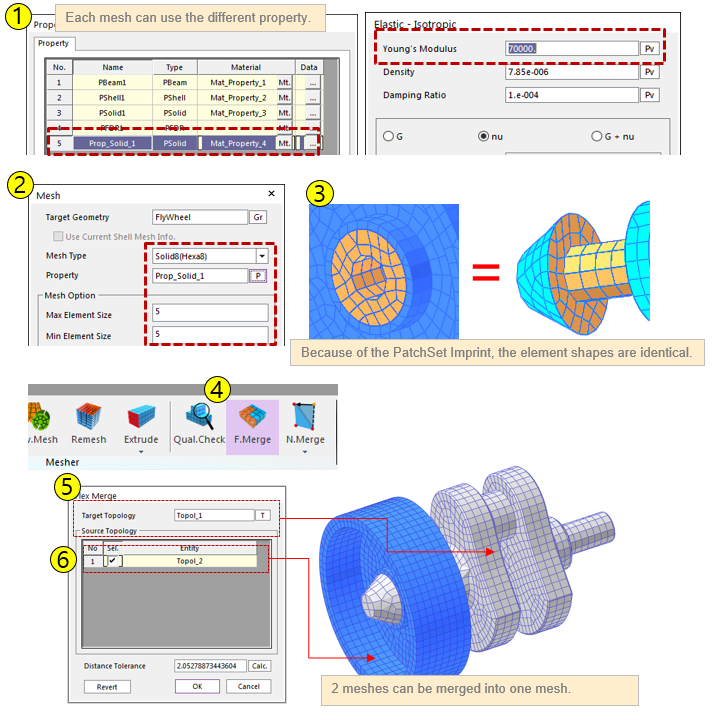
① Create the new solid property, “Prop_Solid_1” and the new material property, “Mat_Property_4”
② Mesh “FlyWheel” with Solid8 elements (use 5mm for Min/Max Size.) and use the Prop_Solid_1.
③ You can use the “Display” function to check if the shape of elements for PSolid2 (Property Component) and SetPatch1 are identical.
④ Click Flex Merge (Mesher tab, Mesher group, F.Merge command)
⑤ Select “Topol_1” for Target Topology (the 1st mesh)
⑥ Select checkbox of the Sel. column in the 1st row (Topol_2) of the source Topology.
⑦ Click “OK” button, then RecurDyn Mesher merges the 2 meshes into one mesh.
※ Note: If you DON’T use ‘Flex Merge’, then each mesh is treated as an independent mesh (body)
Multi-Meshing is now complete